March 21, 2017 at 4:00 pm | Author: ray_westcoastmodernscape | Posted in Landscaping Tips & Tricks
The landscape construction project we will be discussing, will incorporate a wide range of outdoor living applications. Our project will include site excavation, concrete walls, a water feature, deck, paver patio, fence, garden beds and lawn. I will take you through, step by step the landscape construction process. Making sure your build is organized and different projects are completed in the correct order will maximize efficiency and ensure quality.
The first step in any landscape construction project is site excavation. Working from back to front grade the site making sure all your levels are to the correct height. Then the footing trench for the concrete wall should be dug and excess material can be removed from site or stored in order to backfill your concrete wall once it is completed. The hole for your water feature should also be dug and the excess material should likewise be dealt with.
Once the excavation is complete all the concrete form work should begin as a lot of operations depend on the completion of the concrete walls before they can be started. Always build the entire footing for your concrete walls first making sure they are straight and level. Once the footings are complete you can erect the form walls. At this point make sure any necessary plumbing is installed through the forms for the water feature. Also at this time dig and pour sonotubes for the support posts for your deck. This way construction will be able to commence once the concrete walls are complete. Once all the concrete forms are complete you can pour the walls and water feature. It is important to try and pour all your concrete at the same time if possible this will save time and money.
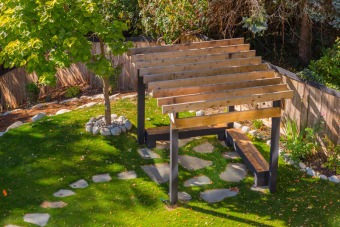
When your concrete is poured given it a minimum of forty eight hours before you strip the forms this will help prevent the concrete from chipping. Construction of the deck can commence while you are waiting for the concrete to set up. Since you have already poured the sonotube for your deck posts construction can begin immediately. Working from the ground up set your deck posts. Then install the beams making sure everything is square and level. The joists are next to be installed keeping them sixteen inches apart. The deck boards, any trim and finishing touches will complete your deck.
The next step is to lay your paving stone patio. Road base is the first material needed there should be a minimum of four inches of road base covering the entire patio area. The roadbase is raked flat with the desired slope then thoroughly compacted. Coarse sand is then brought in at least one inch thick but it is usually preferable to be an inch and a half to two inches thick. The sand is likewise raked flat and compacted. Using two pipes and a straight edge the sand is screeted perfectly flat to the desired slope. The paving stones are then installed with the outside edges cut to fit. Then the joist are sanded and the patio compacted. Your patio is complete.
At this time the plumbing for your water feature can be completed. The Drainage is then installed behind the concrete wall and backfilled with drain rock and any excess material. It is now time to build the fence making sure the fence is strong with adequate deep post holes, and that the fence is straight and plumb. Once the fence is complete the concrete wall along with the garden beds are filled with garden soil and then all the plating is completed. The first step in laying the turf will be to bring in the turf beld soil. Turf bled is a 50/50 mixture of soil and sand to add structure and drainage to the lawn. The soil is then raked flat with the desired slope. The area is then thoroughly rolled with a heavy water filled lawn roller to compact the soil. Fertilizer is then added and the turf is laid. Once the turf is down it is then watered and rolled again.
With all the projects complete a good pressure washing of the entire site is recommended to leave a beautiful clean finished outdoor living project.
